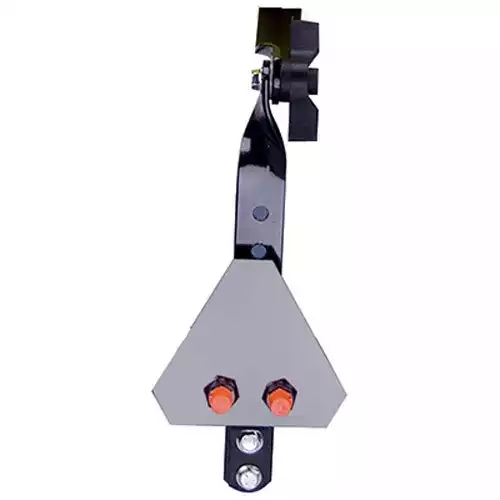
Boomless sprayers are great for spraying pastures, lawns, orchards, roadsides, and more. The unique design of a boomless spray nozzle produces a pattern that can cover the same width as a conventional spray boom but still maneuver around obstacles.
This is why building a boomless sprayer is an appealing idea for anyone who wants a simple, versatile, and less expansive option for weed control. You can easily turn just about any sprayer into a boomless sprayer. However, there are a few key things that you need to account for when setting it up.
If you are looking for some help building a boomless sprayer then keep reading. I will share my experiences and cover in detail the various boomless nozzle options.
Key Aspects of Building a Boomless Sprayer
Selecting the Right Boomless Nozzle Size
If you want to set up a boomless sprayer, the first thing to consider is the nozzle size you need. Boomless sprayer nozzles are available in many different sizes. The size refers to the capacity that each nozzle will flow per minute at a certain pressure. For example, the chart below shows the nozzle capacity for the boomless nozzles that I installed on a small lawn sprayer, the TeeJet XP BoomJet:

Unlike with a sprayer boom, you do not need to calculate the output of your sprayer. Because a pair of boomless nozzles (sometimes just one nozzle) will replace an entire boom, each boomless nozzle will come with information that tells you the gallons per acre that it will apply at different speeds.
With so many boomless nozzle brands and sizes available it can be hard to know which one to choose. Selecting a boomless nozzle comes down to three things: your desired swath width, your gallons-per-acre rate required, and the type of spraying you will do. You can get a full guide in this article on the best boomless nozzles.
As I mentioned above, I went with a set of TeeJet brand boomless nozzles. As you see in the chart above each nozzle has a capacity of 1 GPM at 40 psi. The pump on my sprayer has a 3.5 gallons-per-minute output, so I needed a pair of nozzles that would have a total capacity below this.
When mounted at 36″ high two of these nozzles together can cover almost 25 feet in one pass of the sprayer. These nozzles are made from chemical and wear-resistant acetal. They are high quality but not as expensive as stainless steel boomless nozzles.
It takes both a left and a right version to give you the full boomless spray pattern:
Boomless Spray Pattern
Like nozzle size, there are different spray patterns and spray distances available. Typically boomless nozzles are used in a pair. One spraying left and one to the right, with their patterns overlapping in the center. There are also full pattern nozzles and roadside versions available.

Video Showing Spray Pattern of Boomless Spray Nozzles
Pump and Plumbing Size for a Boomless Sprayer
One overlooked aspect of boomless sprayers is the pump and plumbing that is required. Your pump, hoses, and other plumbing must be able to accommodate the flow capacity of your nozzles. A sprayer with a 2 GPM 12-volt pump will not be large enough to supply 2 boomless nozzles that need 3-4 GPM each to produce a 36 ft swath.
If you are starting from scratch you can identify the nozzles that will have the desired flow and coverage for your job then size a pump accordingly. If you want to convert an existing sprayer to a boomless sprayer, you must know what your pump’s output is before you can choose nozzles.
One specific plumbing factor to account for is the size of the hose that feeds each nozzle. For small capacity nozzles, 1-3 GPM, it will suffice to use a 1/2 inside diameter hose to supply your nozzles. If you are using nozzles that are larger than this then 3/4 inch or possibly even larger should be used.
This chart shows the minimum recommended hose size to supply different nozzle sizes.
| Nozzle Capacity (total for all nozzles) | Hose Size (Inside diameter) |
| 5 GPM or less | ½ inch |
| 5-10 GPM | ¾ inch |
| 10-30 GPM | 1 inch |
| 30-60 GPM | 1-1/2 inch |
DIY Boomless Sprayer Diagram
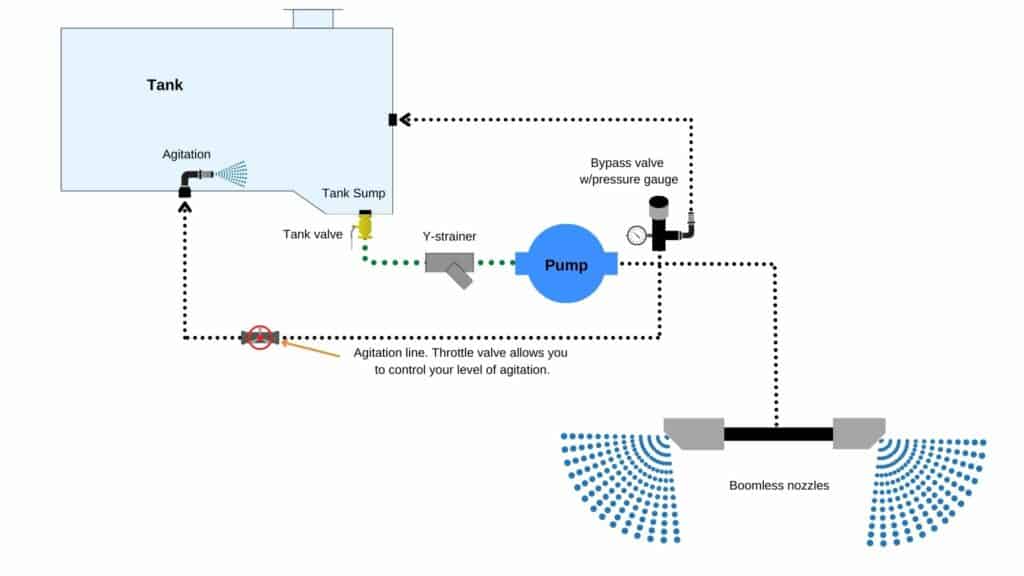
Components You Need to Build A Boomless Sprayer
Overall a boomless sprayer is put together basically the same as other sprayers. The primary difference is with the boom and nozzles. If you want to build a boomless sprayer from scratch you will need these items:
Tank
There are countless different types of tanks. There really is no wrong tank, but there are several things to consider:
- Size
- Shape
- Weight
- Center of gravity
- Wall thickness
Pump
The type of pump you need for a boomless sprayer will depend upon the flow requirements you need and the liquid you will be spraying. Once you have determined the size of the nozzle you need. Then you can choose a pump that can supply that flow rate. It is a good idea to size your pump about 20% larger than what the nozzles need. This can cover your agitation and any pressure loss in your plumbing.
Your pump needs to be compatible with the fluid you will be pumping. In most cases, you will likely be spraying a pesticide/herbicide mix that is primarily water so finding a pump will not be too difficult.
12-volt diaphragm pumps with Viton, EPDM, or Santoprene internals will work for small-flow applications. Cast iron or stainless steel centrifugal and roller pumps will work for larger applications. The seals of your pump should be EPDM or Viton seals.
Medium and high-pressure diaphragm pumps will also work, but they typically produce far more pressure than is needed for a boomless sprayer. Unless you want to be able to use a handgun to spray trees in addition to using boomless nozzles, I would stick with centrifugal or 12-volt pumps.
Strainer
A poly strainer should be installed before the inlet of the pump. The strainer port size should be at least the same size as your pump inlet.
Hose
One key to remember about the hose you need on your sprayer is the suction hose. The section of hose that feeds the inlet of your pup from your tank needs to be a non-collapsable hose rated for suction use. Generally, these hoses will be labeled as such. They have a steel or plastic coil in them to give them strength and keep them from collapsing under the suction created by your pump.
EPDM rubber hoses work best for pesticides and herbicides as well as fertilizers and de-ice liquids.
Control Valve/Regulating Valve
A regulating valve is necessary to control your operating pressure. There are manual regulating valves but you might choose electronic auto rate control for larger sprayers.
Other Items
- Plumbing fittings
- Ball valves
- Hose clamps
- Pipe thread sealer/Teflon tape
Optional Components:
- Tank saddle/frame
- Spray gun
- Electronic controls
If you are thinking of building a sprayer yourself, you can find a simple guide on building a small quality sprayer here.
How to Mount Boomless Spray Nozzles
Mounting your boomless sprayer nozzles is pretty simple. There are several ways to go about this. The simplest method is to use a “T” fitting and appropriate length pipe nipples to adequately space the nozzles. Then run the supply hose from the pump discharge to the tee fitting.
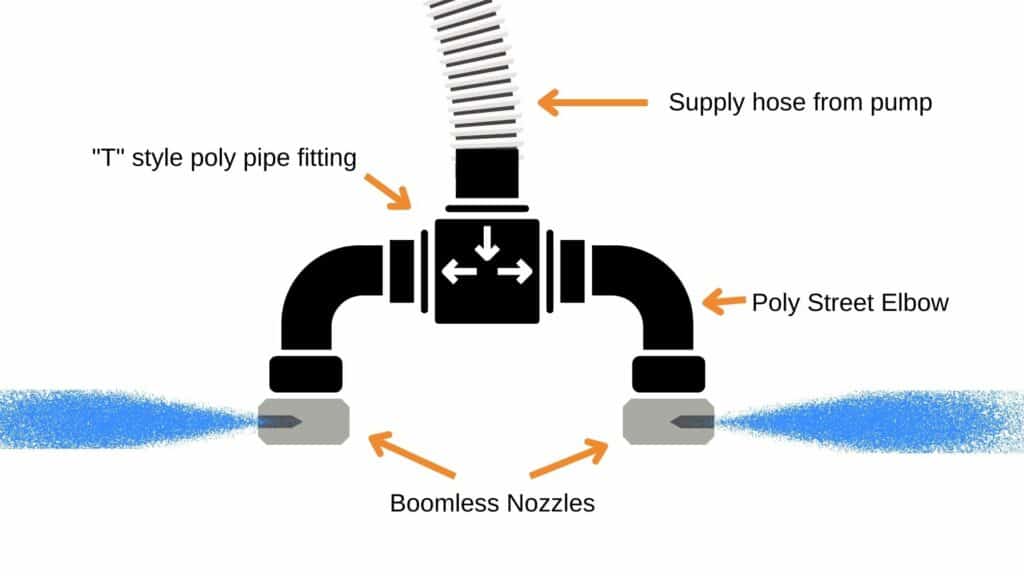
If you want to control each nozzle individually. You would simply need to install ball valves inline and then run hoses from each valve to each nozzle. This can be used when spraying roadside, fence lines, or for any reason, you don’t want to spray in both directions.
Most boomless nozzles are threaded and small boomless nozzles are typically 1/4 inch pipe thread. You can use nozzle bodies and threaded caps to mount your nozzles. I used the nozzle body pictured below. They work with a boom clamp that connects them to round or square pipes. Using these components may be more costly, but you don’t need to weld anything.
This group of photos displays the simple route I took when mounting boomless nozzles onto the rear of my mower. I used a 3/4 inch square tube to the nozzle’s spray pattern would clear the rear tire. Depending on your setup, you may be able to get by with a shorter piece of tubing.
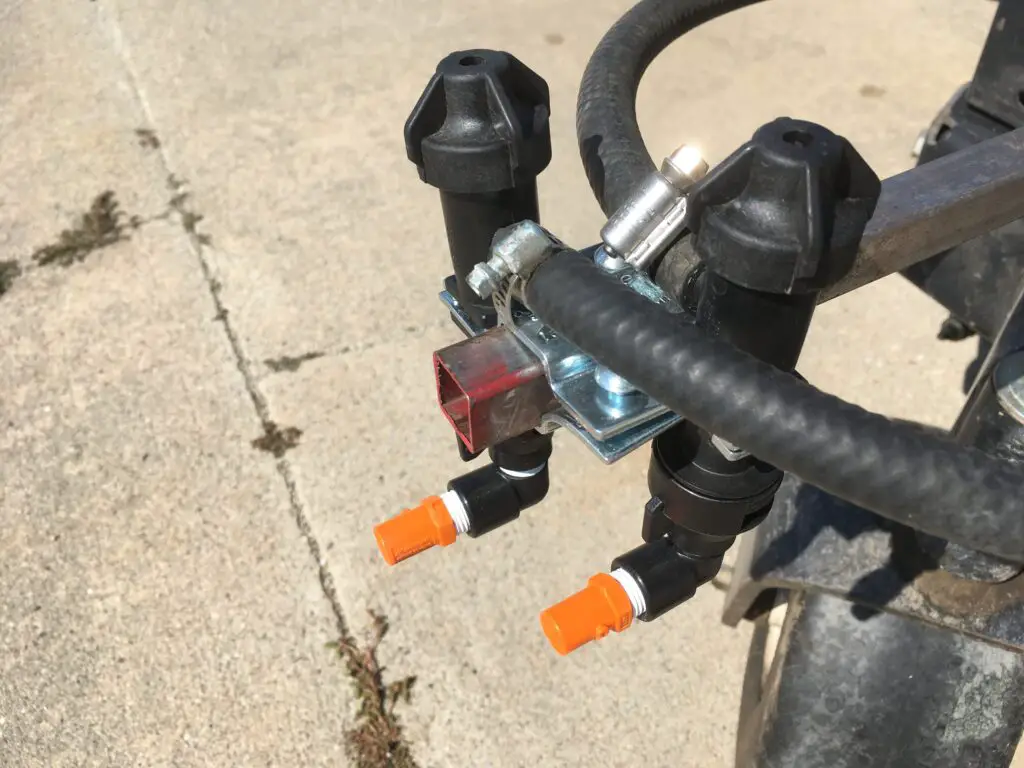

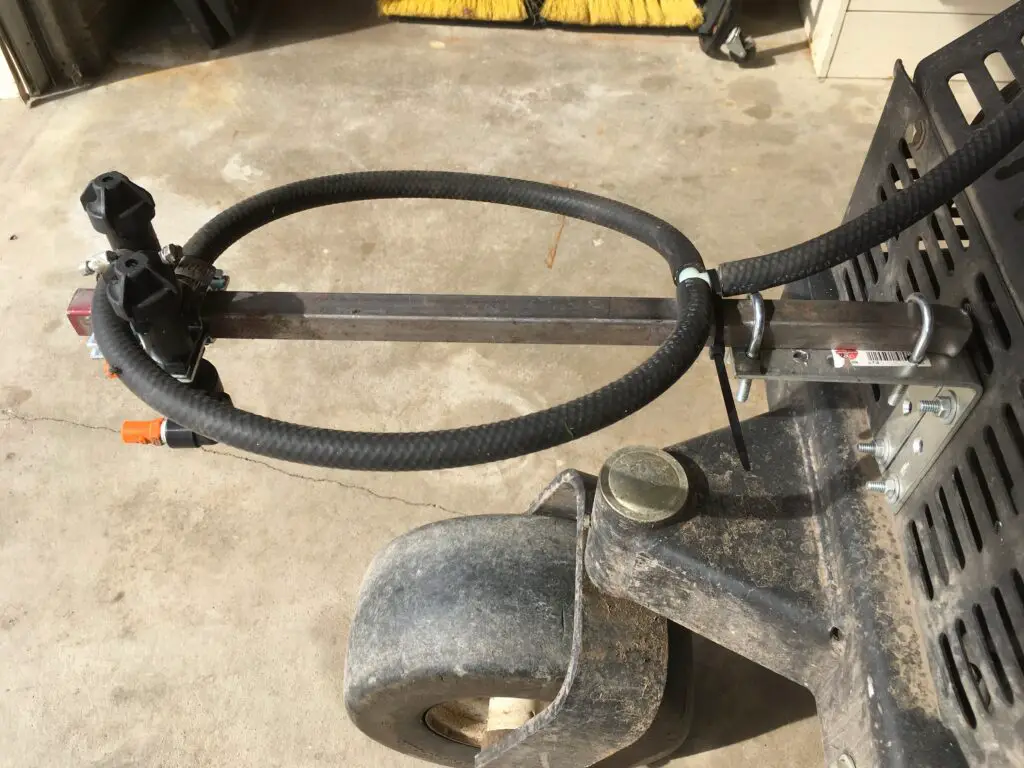
You can find all of the items used to mount these boomless nozzles here:
- Square Pipe x 2
- “L” Brackets x 2 (You can use a different bracket depending on what you are mounting your nozzles on.)
- U-bolts x 4
- Left Nozzle x 1
- Right Nozzle x 1
- Nozzle Bodies x 2
- Nozzle Cap x 2
- Street Elbow x 2
- Pipe Sealer x 1
- Hose Clamps x 1 Pack
- Hose (25 ft package, the length you need may vary.)
However you choose to mount your nozzles, you will want to make sure the distance between the nozzles allows them to overlap sufficiently. For smaller capacity boomless nozzles, ¼ MPT, they can be spaced 3-4 inches apart. Larger capacity nozzles, ½ MPT or larger, can be spaced about 6-8 inches apart. You should run your sprayer with water to ensure that the spray pattern generated by the nozzles at your operating pressure does indeed overlap.
Not all boomless nozzles have the same orientation, so you may need to adjust your setup accordingly. You can see a variety of different boomless nozzle types in this post about the best boomless sprayer nozzles.
Mounting Height For Boomless Sprayer Nozzles
One of the most common questions I receive regarding boomless sprayers is: “How high should the nozzles be mounted?” This is a good question because the height of the nozzle affects how far the nozzles will reach. The vast majority of boomless spray nozzles are designed to be mounted 18-48 inches from the ground.

I find that the ideal height is about 36 inches. It is high enough to provide good coverage while limiting the chances of the nozzles hitting the ground if you hit a ditch or bump. 36 inches is often used as the operating height in the manufacturer’s application charts so you don’t have to guess about your coverage or application rates.
Premade Boomless Options
Building a boomless sprayer is not complicated. If you have an existing sprayer it is very simple to add a boomless setup. You can build it yourself but there are also premade assemblies that also work great. Creating your own allows you to customize it for your situation. You can also make something more heavy-duty if you use stainless steel plumbing components. Most of the premade boomless setups are made of plastic or poly pieces. While they are not as durable they are affordable and allow you to get up and running quickly.
