Salt Brine and other liquid de-icers are effective alternatives to rock salt for ice prevention and melting on roads, driveways, etc. If you are thinking about using these liquid de-icers you need to have a sprayer that can effectively apply these fluids and stand up to the rigors of cold weather. Working with customers over the past several years has helped me to learn what equipment and components are needed for a reliable de-ice sprayer.
Basic Components of De-Ice Sprayer
Applying liquid de-ice or anti-ice treatment requires special equipment. While the type of sprayer used for turf and fertilizer is very similar to de-ice sprayers, there are differences in the application, environment, and liquids used. I discuss these differences more in this post about using a turf sprayer for de-icing.
No matter how large or small your liquid deice sprayer is, you will need these basic components:
- Tank
- Pump
- Boom
- Spray Nozzles
- Sprayer Controls
There are many different types of each of these components available. Selecting the one that is right for you depends on your specific situation. Let’s examine some of the different variables that you should consider.
Things to Consider When Building A De-ice Sprayer
Before you put a de-ice sprayer together, you need to determine the type of applicator you need. Here are some questions to consider:
What will you be spraying? Highways, City Streets, Parking lots, sidewalks
When spraying highways you will need to travel at higher speeds than when spraying side streets or parking lots. This means higher volume pumps and nozzles.
The spray boom needed for highways or streets will also need to have section control so you can choose to spray only one lane when other vehicles are present.
Will You Pretreat, Post-treat, or Both?
Pretreating or “prewetting” rates are different than post-treating. Again, this requires different size nozzles. When spraying after snow or ice is on the road, solid stream nozzles are recommended. The solid stream penetrates the snow and ice to help expedite the melting process.
How Will You Mount the Sprayer?
You can make a de-ice sprayer for almost any type of vehicle. Dump trucks, pickups, UTVs, etc. Always consider the weight of a sprayer with a full tank. De-icing liquids often weigh more than water. Even a 100-gallon tank sprayer can weigh over 1000 pounds when full. Be sure your truck, UTV, or equipment can handle the weight.
What product will you spray?
There are several products sold for de-ice/anti-ice treatment. Some products are harder on equipment than others. Just like with fertilizer, fuels, or herbicides, compatibility is key. When building a liquid de-ice sprayer, check that the pump, hose, tank, fittings, etc are made from materials that can hold up to the liquids you will spray.
Here are some common de-ice products:
- Salt brine
- Magnesium chloride
- Calcium chloride
- Beet juice
- Potassium acetate
How Will You Control the Sprayer?
For parking lots or areas where you will have a fairly constant speed, you can probably get by with manual controls.
If you spray over the road and want your rate to adjust automatically as you change speed then you will need a more sophisticated setup. This will require flow meters, regulating valves, and speed/GPS sensors.
Choosing the Right Equipment for Your De-Ice Sprayer
While the basics of a de-icing sprayer will be the same, your specific application will affect the size of your nozzles, tank, pump, and your rate control. If you are still here then you probably have questions so let’s dig in.
Sizing Your Tank
You can generally use as large of a tank as you like, assuming your truck, UTV, etc, can handle it. For a starting place, determine the size of jobs you will typically do. For example, if you want to treat several miles of road at a time, you must know what rate you will apply*. The rate will tell us how much product you will actually be spraying per lane mile. Say you need to apply 20 gallons per lane mile, then a 1000-gallon tank would allow you to treat about 50 miles of road.
This provides a general guide for what size of tank you would need. The strength of your tank is also important. Polyethylene tanks are great for de-icing and anti-ice spraying but not all poly tanks are equal. Salt brine and other de-ice liquids can weigh more than water and may require tanks that have a thicker wall, especially with the added stress on the tank from traveling down the road.
Typically polyethylene tanks are rated to hold liquids weighing up to 12 lbs per gallon or even more, but it is important to make sure before buying one.
- You can ask your chemical supplier for information on what rate to apply.
- If you are treating driveways parking lots, or other areas, your rate will be how much you apply per square foot or 1000 square feet instead of per lane mile.
Selecting A De-ice Pump
A de-ice sprayer will need a pump that can both handle the liquid you are spraying as well as produce the volume needed to maintain your application rate. Small sprayers may get by with a 12-volt diaphragm pump. You have probably seen these on spot sprayers and ATV herbicide sprayers. Your maximum output from one of these is going to be about 3-4 gallons per minute. Larger applications will require a centrifugal pump.
Centrifugal pumps will require more horsepower than the 12-volt diaphragm pump. Gas-engine drive or hydraulic drive pumps work best for onboard sprayer applications. If you have hydraulic power available that is the way to go. If not a gas-engine unit can be used. Hydraulic pumps can be controlled from your cab easier, but engine-drive pumps can be remotely controlled if needed.
There are countless different types of centrifugal pumps. You can use polypropylene body pumps with EPDM or Viton seals. You can also use cast iron pumps and stainless pumps with salt brine. If you spray concentrated magnesium chloride or calcium chloride you would want to stick with a poly pump. Regardless of your pump, you should flush it out with fresh water as often as possible.
The size of the pump you need will depend on your rate. Your application rate and the speed you want to travel will tell you the output of your sprayer in gallons per minute. You can then identify a pump that will supply at least that amount. It is recommended that you oversize your pump slightly to account for agitation, pressure loss, and rate changes.
How to Plumb a De-Icing Sprayer
There are several ways you can plumb your de-ice sprayer. My advice is to keep it simple. I have a general layout pictured below. You may desire more features and that will require additional plumbing. There are a few keys to remember when plumbing any sprayer:
- Use a reinforced suction hose prior to your pump. A centrifugal pump can generate enough suction to collapse rubber hoses that are not rated for suction.
- Ensure that you use a hose at least as large as the inlet of the pump. A smaller hose will restrict the flow to the pump and can damage the seal.
- Use an appropriate size hose on the discharge side of the pump to allow plenty of flow to your boom.
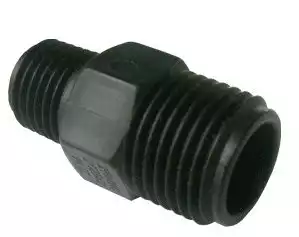
- When possible use manifold flange fittings for your connections. These make it much easier to make changes or replace sections. You can find more information in my post on manifold flanges.
- Don’t overtighten poly fittings or they may crack. Hand tighten poly fittings then rotate about 1 time with a wrench. Do not use Teflon tape on poly or plastic fittings, instead use a pipe compound like Rectorseal 5.

De-Ice Spray Boom
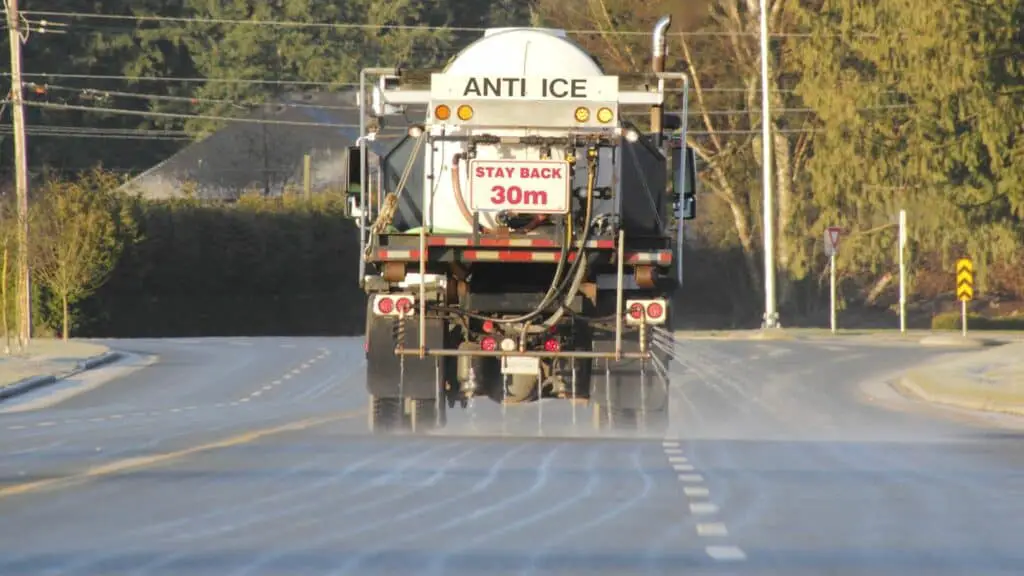
De-ice and Anti-ice spray booms are different than the booms used for spraying crops, lawns, etc. The nozzles are generally larger in size and they are spaced closer together. Although fan nozzles can be used for pre-treating, solid stream nozzles are better for post-treating. They penetrate the snow and ice better for faster melt. The image below shows solid stream nozzles used on a de-icing truck.
If you are just starting out and want a simple inexpensive way to put together a de-ice boom, you can use schedule 80 PVC pipe. 7-8 feet of pipe will be enough to make an effect boom for use with UTVs, or tucks. Your nozzles should be evenly spaced about 8-9 inches apart.
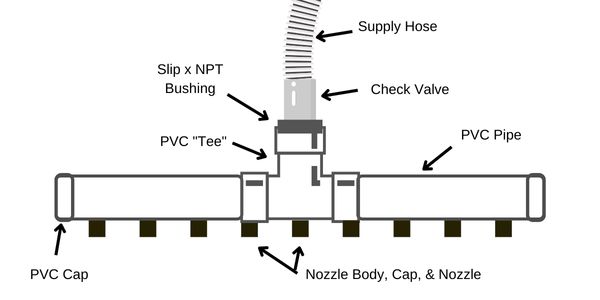
Use a tee in the center of the boom so you can connect the supply hose. You should install a check valve at the inlet tee fitting. This will keep the boom from dripping out product when you shut off your sprayer.
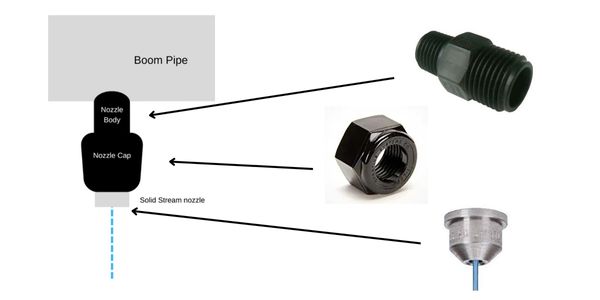
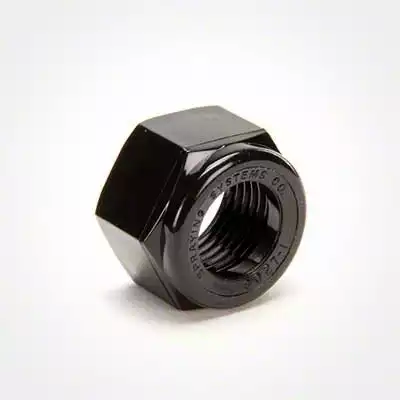
The nozzle bodies and caps shown above are the simplest way to go. The nozzle bodies will thread into 1/4 inch female national pipe thread. So all you need to do is use a 1/4 inch NPT thread tap in the PVC pipe and then your nozzle bodies can be installed. Be sure to use pipe sealant. For poly and PVC pipe Rectorseal 5 works great.
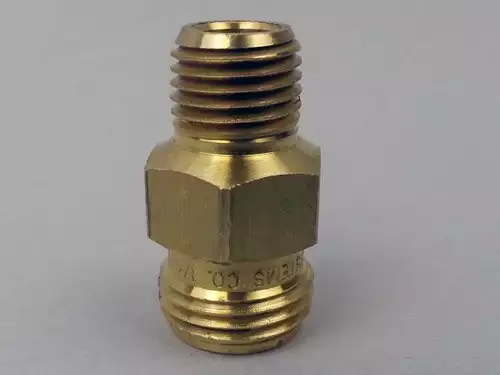
The nozzle bodies are available in poly, brass, and stainless steel. Poly is the least expensive but brass and stainless would be more durable:

Be sure that you use PVC pipe large enough to provide the capacity needed for your nozzles. This goes the same with the supply hose and check valve. 1 inch is the smallest pipe size I would use, a larger pipe will be easier the tap.
Anti-Ice Sprayer Controls
One of the most important aspects of a sprayer is how you control the rate that is being supplied. There are two basic options: manual and automatic rate control. Manual control is the simpler option. In this method, you use a regulating valve to control the operating pressure of the sprayer. The spray nozzles will produce a certain amount of flow at a given PSI, so increasing pressure means more output from your sprayer. So if you want to speed up or slow down you can adjust the pressure accordingly.
How do I know what pressure to operate my sprayer? You must determine what pressure to operate your sprayer based on your application rate. In this article, I thoroughly explain the difference between manual and automatic rate control and how to calculate the operating pressure that will hit your target rate.
If you want your sprayer to maintain a constant rate automatically as you change speeds, you need automatic rate control. This requires a rate control console, flow meter, regulating valve, and speed sensor/GPS. When these items are installed you can input your desired application rate and parameters in the control console, and it will then adjust the regulating valve accordingly to maintain your rate.
De-Ice Sprayer Manual Rate Control Kit
This setup is a simple way to manually adjust your rate based on the pressure. It also gives you on/off valves or up to three boom sections.
TeeJet 744 Manual Adjust Rate Control Kit

- Console with pressure adjustment and on/off switches
- Pressure gauge and sensor
- Regulating valve
- 3-solenoid valves (for on/off boom section control)
- Wiring cables
*These items will vary depending on your sprayer size and the flow capacities that you may need.
Automatic Rate Control Components
Automatic rate control setups get more complex. They require a sprayer controller that can “talk” to the flowmeter, regulating valve, and GPS/speed sensors. While they are much more elaborate and expensive, they provide many benefits and features. For DOT or Municipal use, they may be worth the investment. You can see the plumbing layout for automatic rate control sprayers in this post on ag sprayer plumbing. Even though it is for ag sprayers the principles and plumbing remain the same.
Conclusion
Building a liquid de-ice sprayer does not need to be complicated. There are many ways to do it successfully. The key is to pinpoint the volume of output you need from your sprayer and the type of vehicle your sprayer will need to fit in. From there you can follow the basic guidelines provide above to build a new sprayer or convert a turf sprayer for de-icing and anti-ice use.