Getting your property sprayed requires a lot of things to line up. You need the time, the right equipment, and suitable weather conditions. So when your ATV sprayer pump doesn’t work properly it can be extremely frustrating.
I have been there and today I want to use my experience to help you eliminate frustration and downtime by explaining how to troubleshoot and fix your ATV sprayer pump issues.
How a 12-Volt ATV Sprayer Pump Works
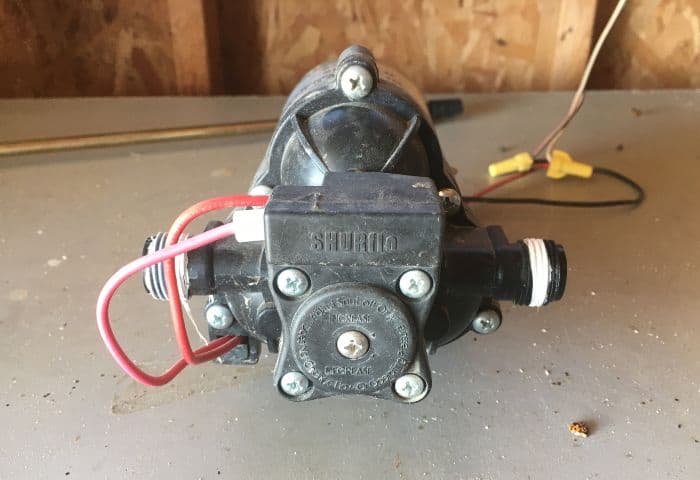
The pumps used on most ATV sprayers are 12-volt diaphragm pumps. They are great pumps for small booms and spot sprayers. There are two versions of this type of pump, demand, and bypass. Demand style is most common for sprayers. This type has a pressure switch that automatically shuts off your pump when you are not spraying.
A 12-volt pump is a simple design. The motor shaft is connected to a wobble plate inside the pump housing. As the motor spins it turns the wobble plate, which opens and closes a set of valves. This action draws liquid into the pump and creates pressure and flow on the discharge side.
If you are new to 12-volt pumps, be sure to view this full guide, and also check out this article I wrote about troubleshooting and repairing a 12-volt pump as well as find
Troubleshooting Your ATV Sprayer
12-volt pumps work great but there are some common problems that might occur if you are using one. However, just because your ATV sprayer is not working properly, don’t automatically assume it is a bad pump or motor. Here are 11 things to check first to make sure your pump is the issue.
Pump Won’t Turn On/Motor Won’t Run
- Check for loose wires and battery connections. Check for corroded battery terminals and loose alligator clips.
- Check for a bad fuse if your sprayer has one. Many sprayers will have a fuse wired into the wire harness that connects to your battery.
- If you have a pressure gauge that is showing pressure in the system but the pump will not run, make sure the spray gun is open. It is possible that your trigger is malfunctioning and your sprayer gun is not opening when you pull the trigger. Also, make sure there are no other valves that may be closed on the discharge side or outlet of the pump.
- Check if your battery is dead. Even if you haven’t been spraying much, or the battery is fairly new, do not overlook this potential cause.
Low Pressure/Low Flow:
- Check for plugs or clogging in the sprayer nozzle, strainer, or filters. Herbicides, fertilizers, or other chemicals you may spray can build up inside your sprayer over time and result in clogs in your filters or nozzles. Debris in your sprayer tank can also clog the inlet filter.
- Check the end of your suction hose for a strainer or the tank outlet, as well as the inlet of the pump. These are all locations where a strainer or screen may be located.
- On the discharge side of your pump, you might have a screen in the wand inlet or under the nozzle.
- Check the voltage of your battery. As a battery runs out of “juice” flow can decrease. Always check the battery before assuming the pump is the issue.
- Check for air leaks/bubbles in the suction line. Make sure your suction hose is submerged completely in the sprayer tank. Air in the suction line is a very common cause of sprayer issues and can lead to a pump losing its prime.
Loss of Prime
- Sometimes a pump will lose its prime and stop drawing liquid out of the tank. The primary cause of this is air in the suction line. Low tank levels can contribute to this. If you spray on a hillside with a low tank level, the suction hose may draw in some air. This can also be caused by cracks in the suction hose. If the pump is drawing in too much air it can lose its prime.
- Replace any cracked hose and force-feed the suction hose with water to regain prime. You can take the suction hose off of the pump, fill it with water and reconnect it.
Pump Surging/Cycling On & Off
- Check your spray nozzles. If there is a plug causing low flow, then the pump may cycle on and off. Unplug the nozzles to see if this eliminates the pump issue. Rinse each nozzle thoroughly and use a wire brush or old toothbrush.
- If you use a nozzle that is adjustable, it may be set on a low volume setting. Increase the nozzle flow and see if cycling stops.
- Adjust the pressure regulator if there is one. If you just installed a pump and do not have a regulating valve, it might be necessary to install one in order to make the pump operate. For more detailed information check out this article I wrote about using a regulating valve with a demand pump.
If you have examined all of these potential issues and the problem persists, then it is time to take a look at the pump itself.
Finding the Reason For Your ATV Pump Failure
ATV Sprayer Pump Motor Does Not Run
The first piece of the pump to examine if the motor does not run is the pressure switch. This is located on the front of the pump head. Generally a small square or rectangle box with 2 wires connected to it. One wire will run to the motor and the other to your power source.
In order to determine if the pressure switch is still working, you will need to disconnect the wires from the pressure switch and connect them two one another. This will bypass the switch. If the motor then runs, you know the problem is in the switch.

Typically, there is an adjustment screw on the switch. You can turn this with a screwdriver slightly to adjust the pressure that will shut off the motor. It may be that your “shut-off” pressure is set too low. You can make slight adjustments and see if this fixes your problem.
If the problem persists. You can open the switch by removing the screws that hold it together. If the spring and diaphragm look good, then it may just be debris or chemical residue causing the issue. Rinse the components and reassemble the switch. Then you can try the pump again.
If this does not remedy the issue, it will likely require a new switch kit. If you can identify the model of your pump you can likely find a switch kit online.
Common 12-Volt Pump Switch Repair Kits:

The switch kit will replace the entire switch assembly. It is common that the components of the switch assembly are not broken and the arm is still able to trigger the micro-switch, and it still does not operate. These small switches will only last for so many on/off cycles before they fail. This is especially common for 12-volt sprayer pumps that surge often.
If you can find a part number on the switch, you could possibly find a new one. This could save money over replacing the entire switch kit.
ATV Sprayer Pump With Low Flow & Pressure
Low or no flow from your sprayer does not always mean the pump is bad or even the issue. But, if you have examined all the potential issues above and still have low flow it is time to check into the pump. The good news is that the pump may still be repairable.
The main pump issues are loss of prime, damage to the internal components, and residue/debris inside the pump.
Internal Damage
Over time the internal pump components will wear out. You can take the pump cover off and inspect the inside of your pump. Inspect the diaphragm wobble plate and valves for damage, warping, or cracks. If any of these are present then you will need to replace these components or get a new pump.
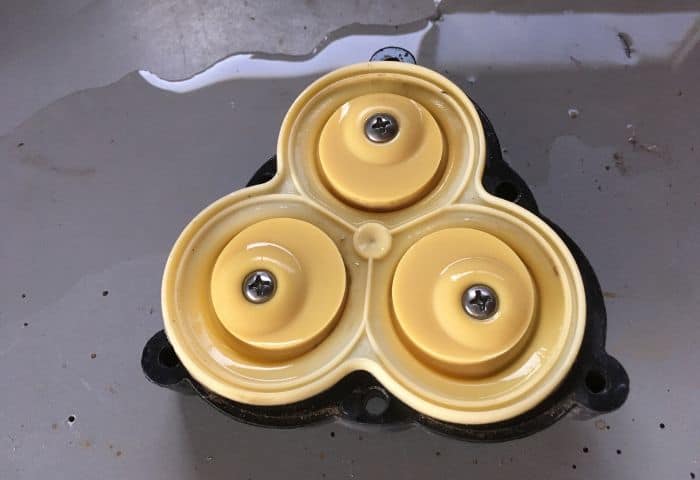

Most 12-volt pump manufacturers will offer both a diaphragm and a valve repair kit. If you know your pump model, it should not be too difficult to find the right kit online. In some cases, it is not economical to repair them, and it is just as easy to order a new pump.
Residue/Debris
If the inside of the pump shows no damage but has sticky residue build-up. Rinse the pump with fresh water and then try to start your sprayer. More than once I have been able to get my pump working again just by rinsing it out.
More 12-Volt Sprayer Pump Help
One more thing to consider is if you have made a change recently to your sprayer, that is where you should start looking for the cause of your sprayer’s failure. Things like adding a longer hose or changing spray nozzles can affect your pump’s performance.
If the problem persists and you are not quite sure what is causing your issue, do not worry. You can find more detailed help to fix your ATV sprayer pump in this 12-volt diaphragm pump troubleshooting guide.
